How do I access the sensor settings?
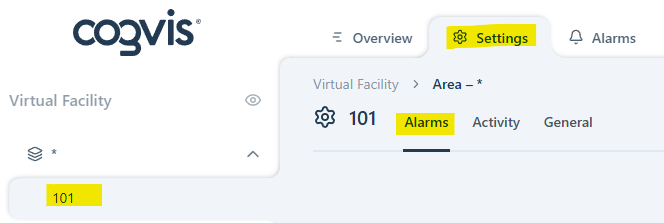
To access the sensor settings, select the desired room in the left navigation bar. Then click on the Settings tab.
The settings for each sensor are divided into: Alarms, Activity and General.
What should I consider when configuring the room?
Before activating sensor settings, make sure the room is configured first.
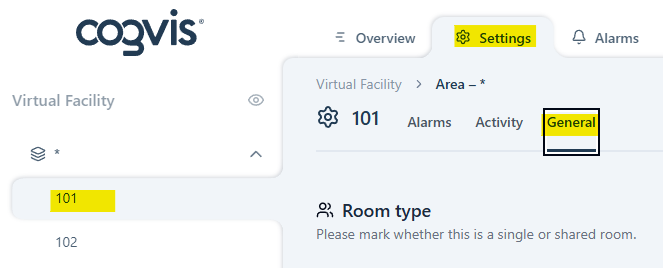
Start with the general settings. To do this, select the desired room in the left navigation bar, click on the Settings tab and then choose General.
Now select the correct room type and define how long the sensor should be paused when the nurse presence button is pressed.
If needed, you can also adjust the sensor orientation and - for cogvis companions Gen 2.0 - specify whether the dockingstation's LED light strip should turn on in the event of a fall alarm.
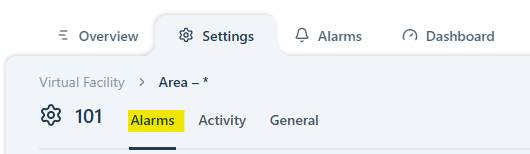
Then please switch to Alarms.
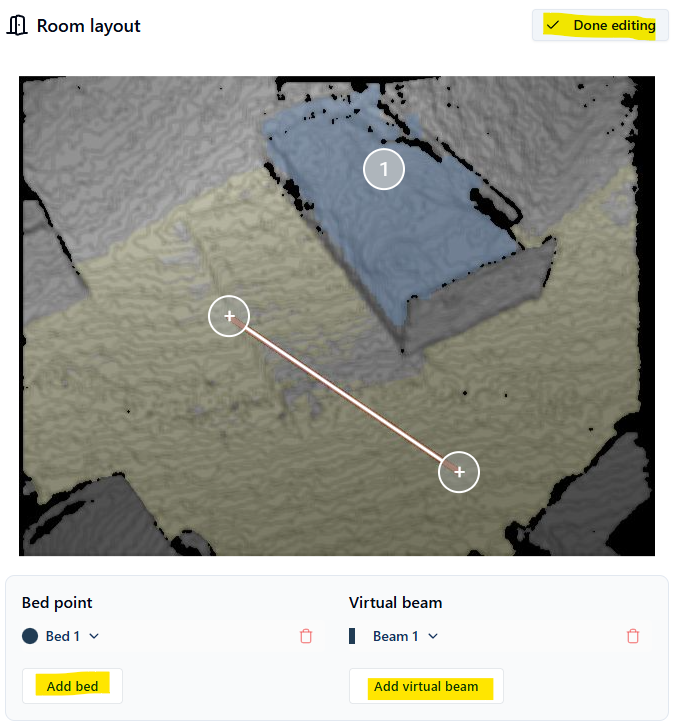
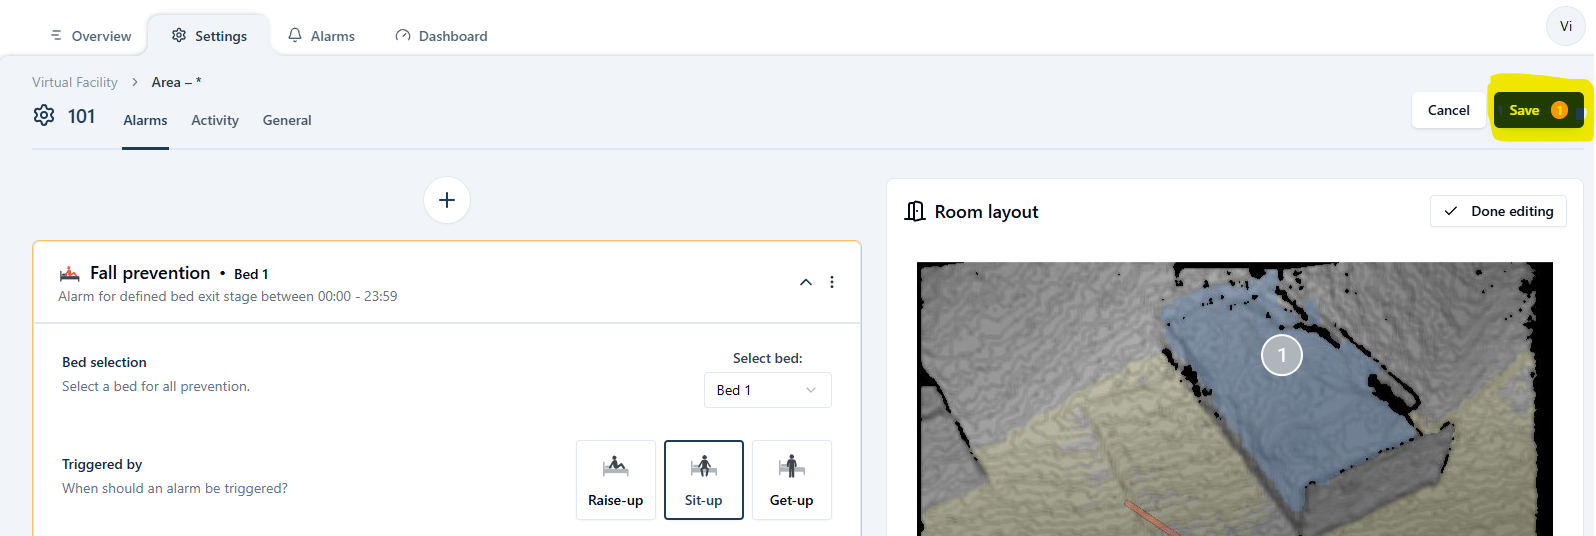
In the next step, please edit the Room layout.
Place a bed point on the bed and, if needed, a virtual beam at the desired position. You can change the bed point's number by clicking the down arrow icon to open the context menu. Once you are finished, click Finish editing to save the sensor settings
Important: When placing or moving bed points or virtual beams, the sensor checks whether the position is valid. This also occurs when editing ends and may take some time. During this process, always wait for feedback from the sensor before making further changes.
For technical reasons, the bed points and end points of the virtual beams cannot be placed on black spots. If this happens, look for a position nearby or adjust the position at a later time. Please pay attention to any messages displayed by the system for further information.
Please always set a bed point - even if you don't intend to use the fall prevention or absence detection modules. Bed points help our smart filters reduce alarms triggered by nursing staff - e.g., when care triggers an alarm while the bed is occupied by a resident/patient.
You can now proceed with activating the sensor settings.
Why do I need bed points and virtual beams?
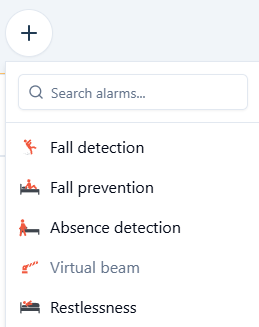
Bed points and virtual beams are required to activate certain modules.
You can only activate the following modules once a bed point is set:
- Fall prevention
- Absence detection
- Restlessness
The same applies to the virtual beam. Without a beam, you cannot add the alarm type virtual beam.
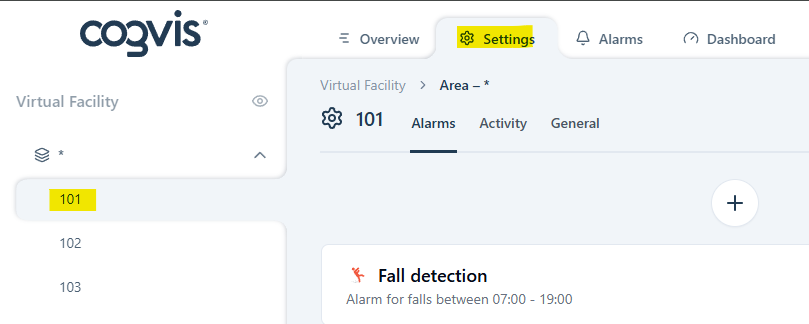
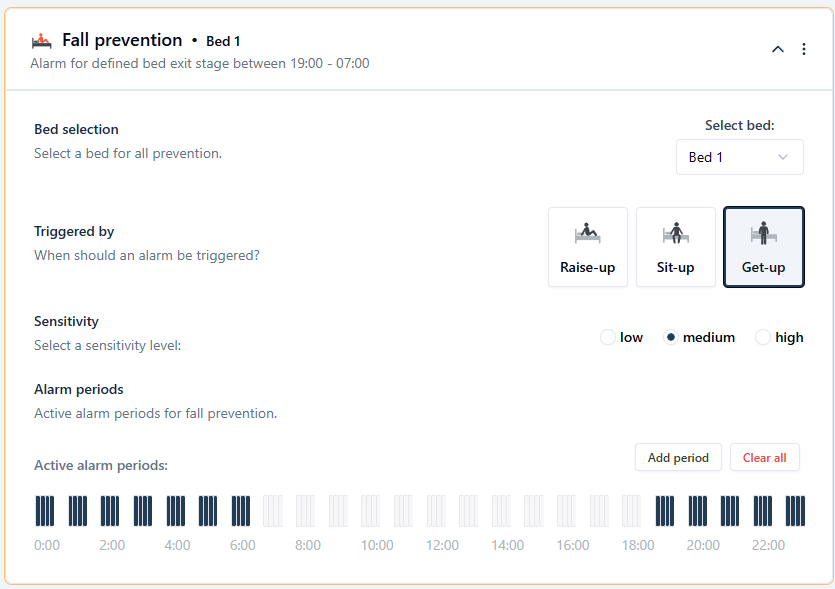
How do I activate individual modules or create a new alarm?
To activate individual modules, click in the desired room and then select the Settings tab.
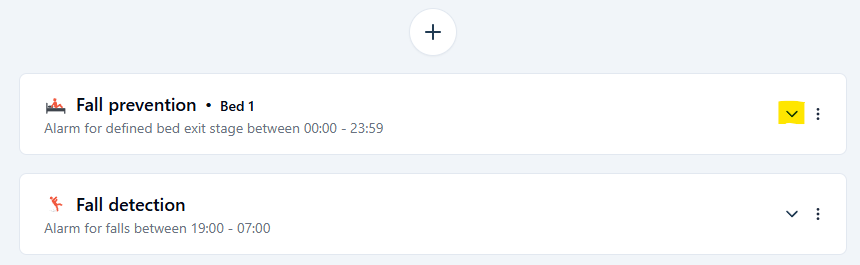
Then click on the + sign, to add individual modules as sensor settings.
When you select a module, it opens a separate window with a colored border. The border indicates that the added or changed settings have not yet been saved.
Adjust the settings per module (e.g., the alarm period) according to your needs and then click on Save..
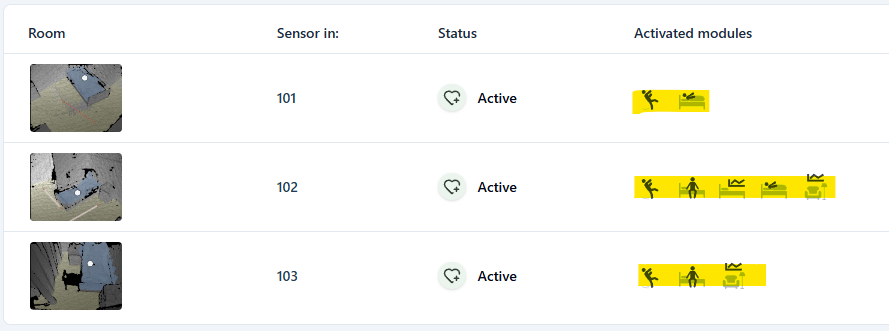
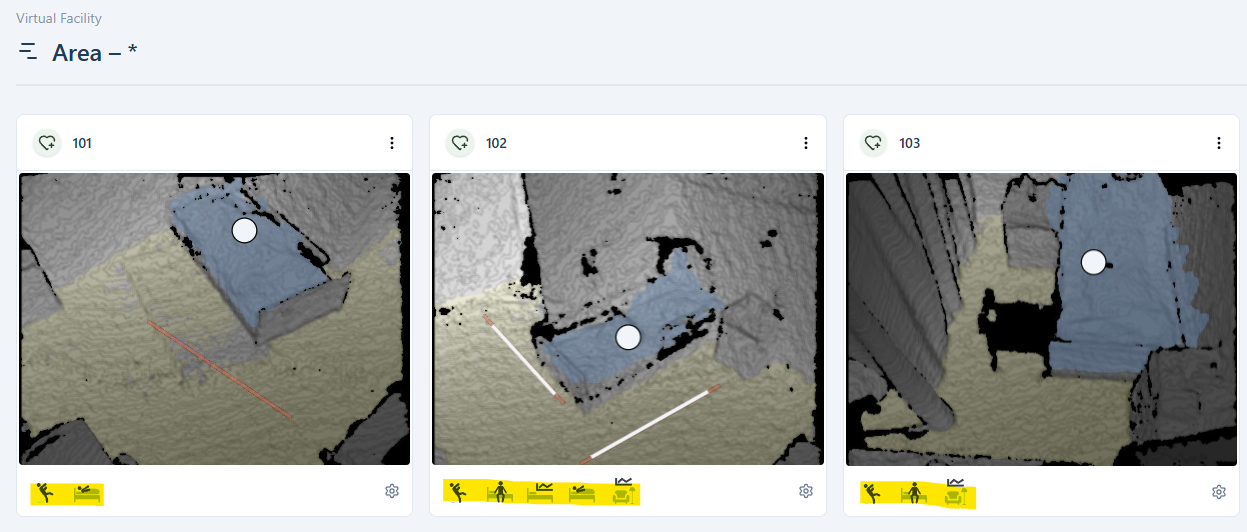
Where can I check which modules or alarms are active?
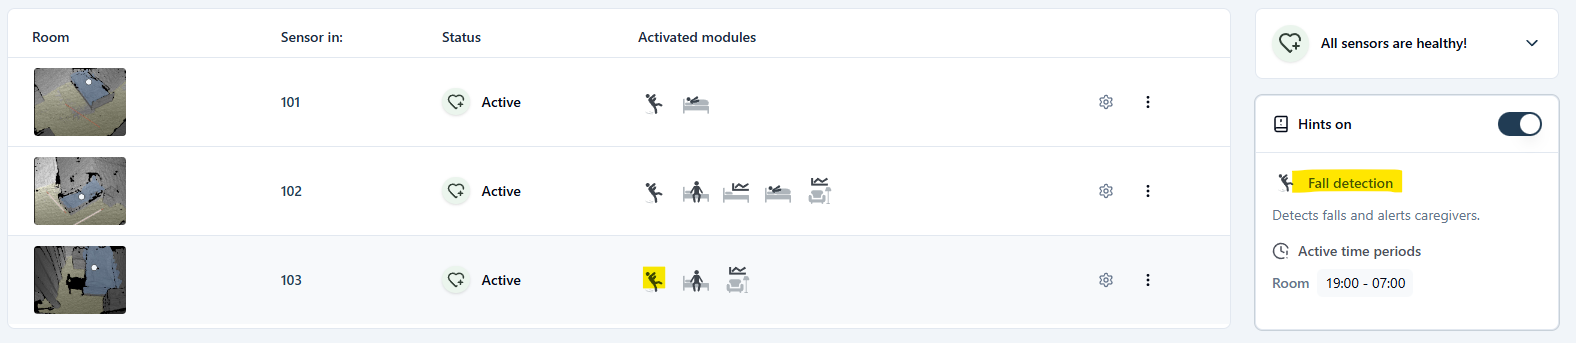
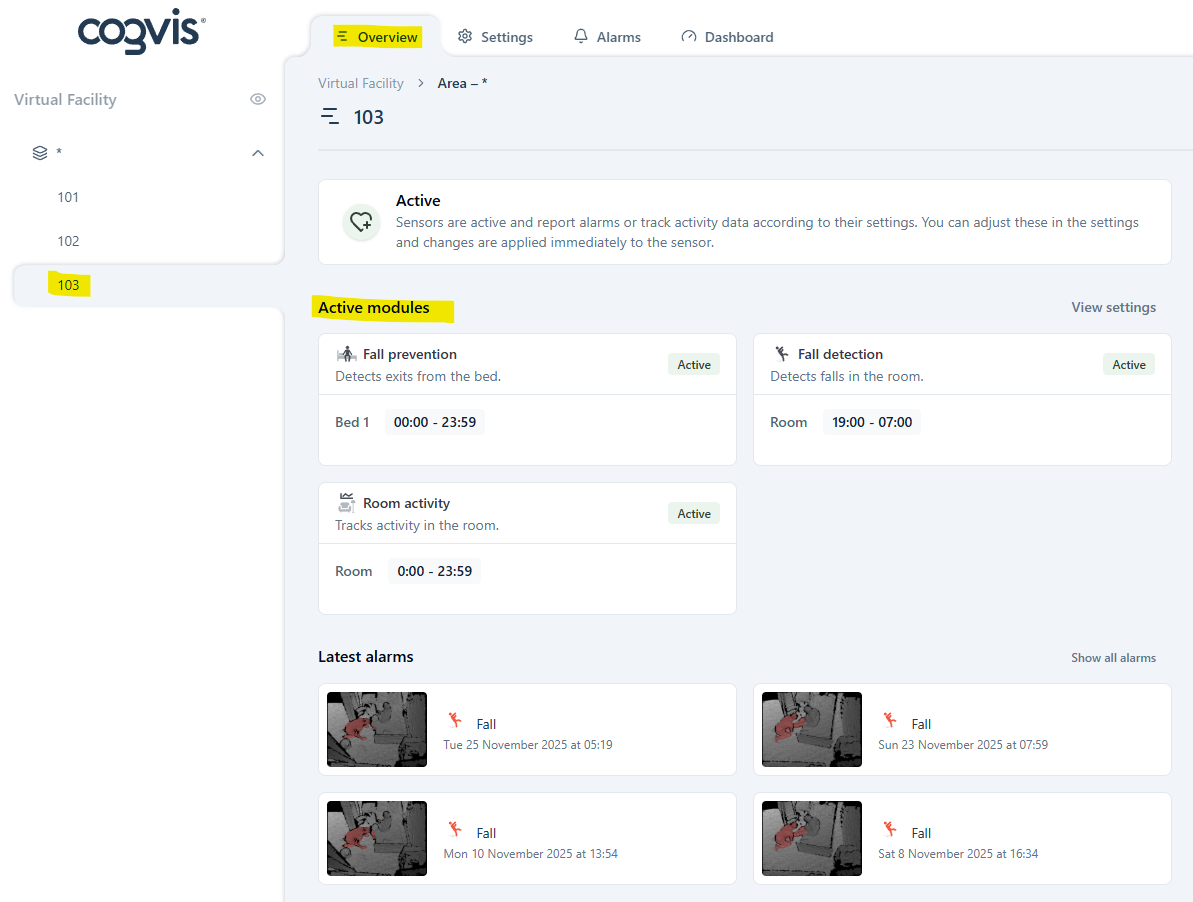
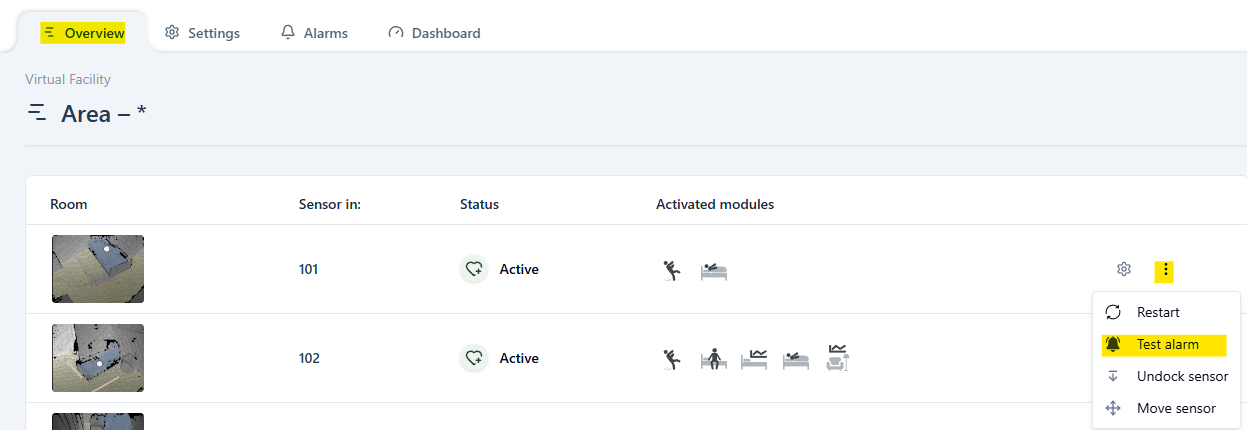
If you want to check which sensor settings are active, select the Overview tab.
At the area level, you can see which modules are activated via the icons in the room list or grid view.
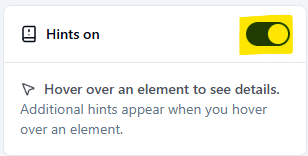
To see which module an icon represents and when it is active, turn on the hints on the right-hand side toggle of the platform.
Hover your mouse over the icons to see more details.
Alternatively, select the room in the left navigation bar for a more detailed view of the sensor settings.
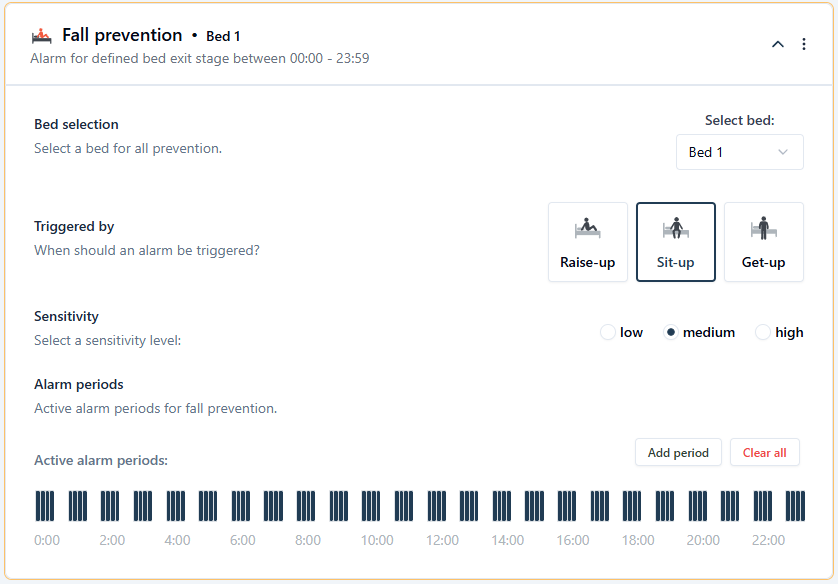
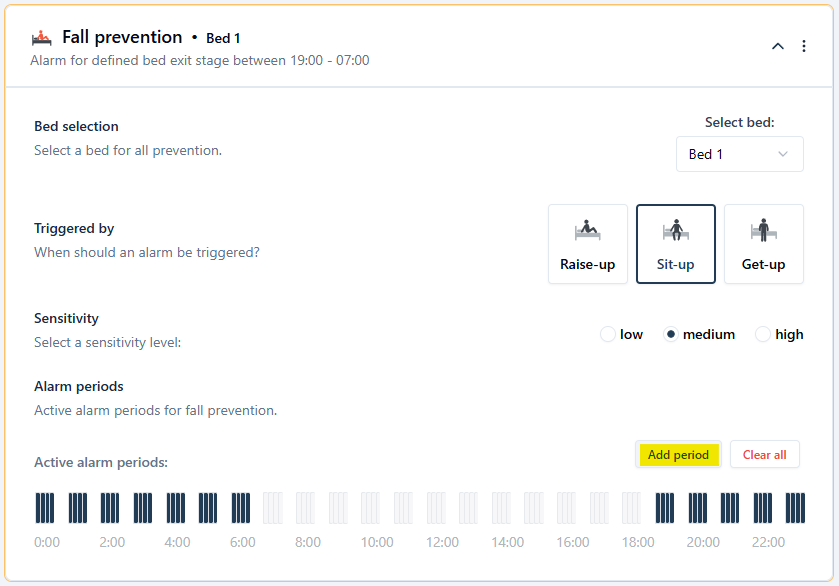
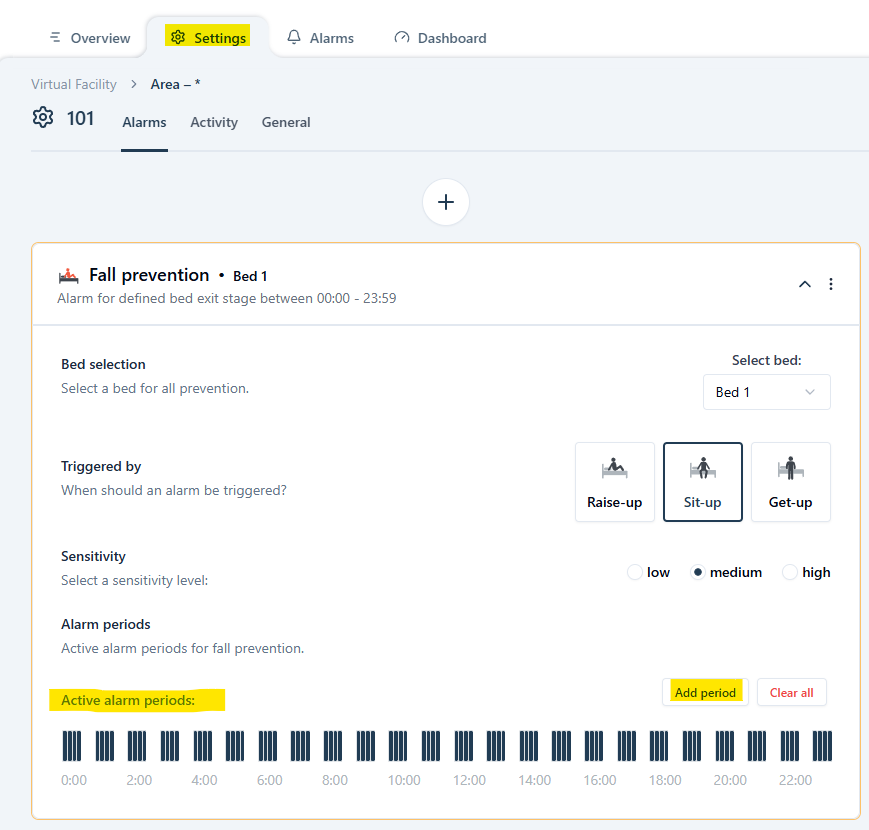
How can I add, adjust or delete alarm periods?
To edit the alarm periods, first open the sensor settings.
Select the activated module for which you want to edit the alarm period.
When you add a module in the sensor settings, the alarm period is set to 24 hours by default. Start editing it by clicking on Click to edit period.
Enter the desired period in the two fields that appear and confirm by using the tick button.
The timeline now shows you the updated alarm period. If you want to add another time period, click on Add period. Zeitraum hinzufügen.
Don't forget to click on Save to ensure all changes are applied.
If you want to reset the alarm periods for the module and start again, click Clear all.
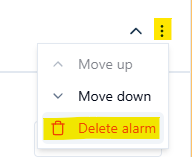
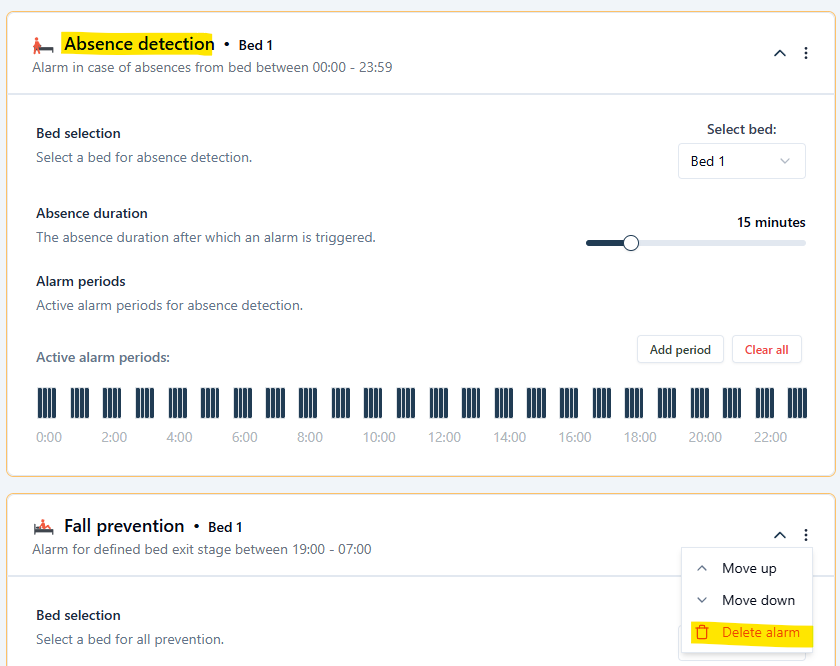
How can I delete active modules?
To deactivate a module, delete the alarm type in the settings. First, open the room's sensor settings.
From the activated modules, select the one you no longer need. Click on the three dots and Delete alarm.
My cogvis companion alerts too little, what can I do?
Do you have the impression that your cogvis companion is not alerting you enough?
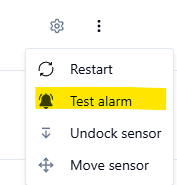
First, check the alarms in the platform's Alarm overview . If alarms visualizations are available on the platform but they are not processed by the nurse call system, trigger a Testalarm via the platform to check the alarm chain. If the alarm does not get processed, please ensure that the nurse call receiver was not unplugged by accident.
Also ensure that the desired alarm periods are set correctly. If this is not the case, please adjust the settings.
Are the sensor settings and alarm periods correct, and is the nurse call receiver plugged in? Please contact our support team!
My cogvis companion alerts too much, what can I do?
Too many alarms are usually associated with inappropriate sensor settings. If you have the impression that your cogvis companion triggers alarms too frequently, please take a look at the alarms on the platform and evaluate whether the current settings and/or alarm periods suit the needs of your residents/patients. With a few minor adjustments, the settings can be tailored to the their needs.
Example 1:
The sensor triggered 15 alarms at night when the person sat-up in bed? Based on this information an alarm would only be relevant for the night shift when they stand up?
Change the alarm settings from sit-up to stand-up.
Example 2:
The person is very active during the night and gets up often. An alarm is triggered as soon as they stand up. However, usually they just walk around a little and go back to bed. The night shift decides they don't have to come into the room every single time.
In this case, it makes sense to switch to absence detection. Now, an alarm is only triggered, if the peron is absent from bed for too long. To do this, remove the fall prevention from the settings and add the absence detection instead.
If you’re unsure which settings are most suitable for your residents/patients or need guidance with making changes, don’t hesitate to contact your Customer Success Manager or our support team. We are happy to provide advice and assist you with fine-tuning the settings.
Where can I set or change the pause duration of the presence button?
To view or change the pause duration of the nurse presence button, go to the sensor settings by selecting the desired room in the left navigation bar. Open the Settings tab and then choose General.
Do you want to adjust the pause duration? Click and hold the slider, then drag it to the desired duration.
My cogvis companion did not detect an event. What could be the reason?
There can be many reasons for a missed event.
First, check the alarms in the platform's Alarm overview . If alarms visualizations are available on the platform but they are not processed by the nurse call system, trigger a Testalarm via the platform to check the alarm chain. If the alarm is not processed, please ensure that the nurse call receiver has not been unplugged accidentally. This causes the nursing staff not to be able to respond.
Also, make sure the event did not occur outside the defined alarm periods and that the sensor settings are correct.
Are the sensor settings and alarm periods correct, and is the nurse call receiver plugged in? Please contact our support team — we will assist in potentially identifying the cause of the missed event.
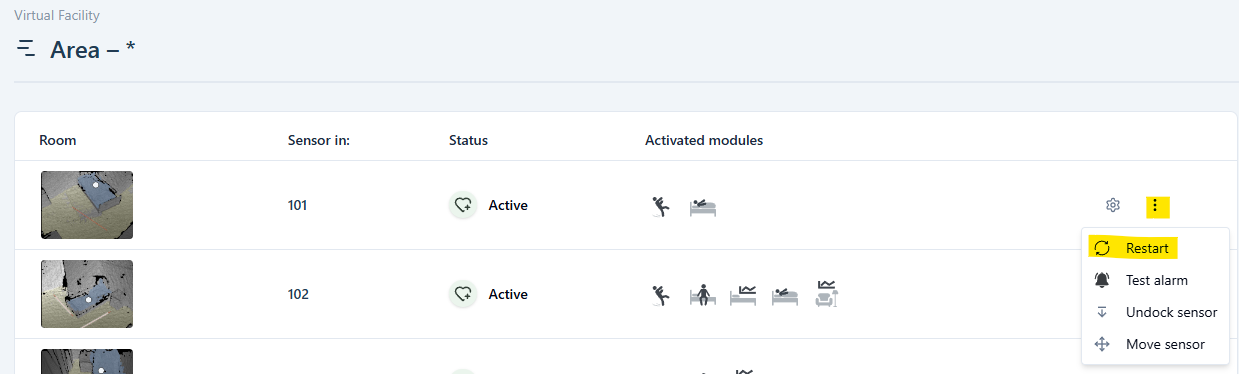
How can I restart my sensor?
If you want to restart your cogvis companion, select the desired room and select the Overviewtab. On the right side of the screen you will find the button Actions. Click on it and then select Restartto update the sensor's field of view.
Alternatively, you can also restart the sensor via the room list/grid view at area level.
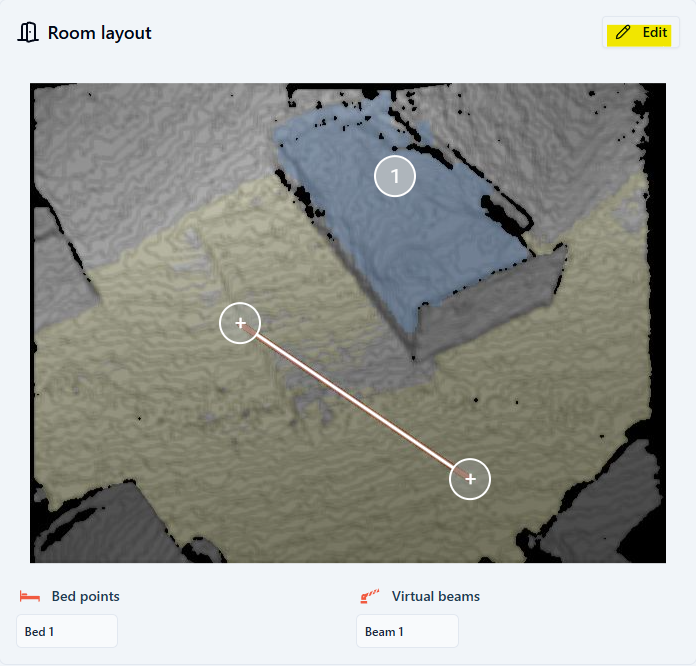
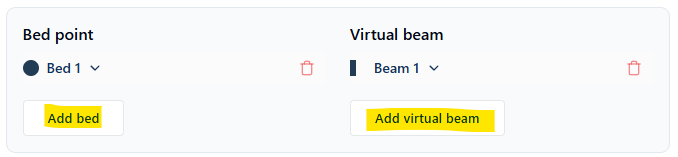
How do I set bed points and virtual beams?
To set bed points and virtual beams, go to the settings of the desired room and select the Settings tab.
As a next step, click on Edit in the room layout.
You can now add or delete bed points and beams below the sensor's field of view.
Important: When placing or moving bed points or virtual beams, the sensor checks whether the position is valid. This also occurs when editing ends and may take some time. During this process, always wait for feedback from the sensor before making further changes.
For technical reasons, the bed points and end points of the virtual beams cannot be placed on black spots. If this happens, look for a position nearby or adjust the position at a later time. Please pay attention to any messages displayed by the system for further information.
Place a bed point on the bed and, if required, a virtual beam at the desired spot. Once you are finished, click on Done editing.
Please always set a bed point - even if you don't intend to use the fall prevention or absence detection modules. Bed points help our smart filters reduce alarms triggered by nursing staff - e.g., when care triggers an alarm while the bed is occupied by a resident/patient.
Why are individual modules greyed out or cannot be activated in the sensor settings?
Bed points and virtual beams are required to activate certain modules.
You can only activate the following modules once a bed point is set:
- Fall prevention
- Absence detection
- Restlessness
The same applies to the virtual beam. Without a beam, you cannot add the alarm type virtual beam.